Works locally
The FridgeCure controller operates the fridge and heater over its own private Wi-Fi network, even when the home router or internet is unavailable.
Automated drying and curing chamber
 FridgeCure
Turn a small fridge into an automated chamber that manages temperature and humidity without relying on the internet or requiring you to install any apps.
The practical chamber concept is inspired by Growtutorials' DIY fridge curing guide. That video is a useful reference for chamber layout, fan placement, and water management.
The FridgeCure controller operates the fridge and heater over its own private Wi-Fi network, even when the home router or internet is unavailable.
FridgeCure learns how the fridge and heater affect the chamber, then adjusts when they switch to keep conditions steadier and protect the equipment.
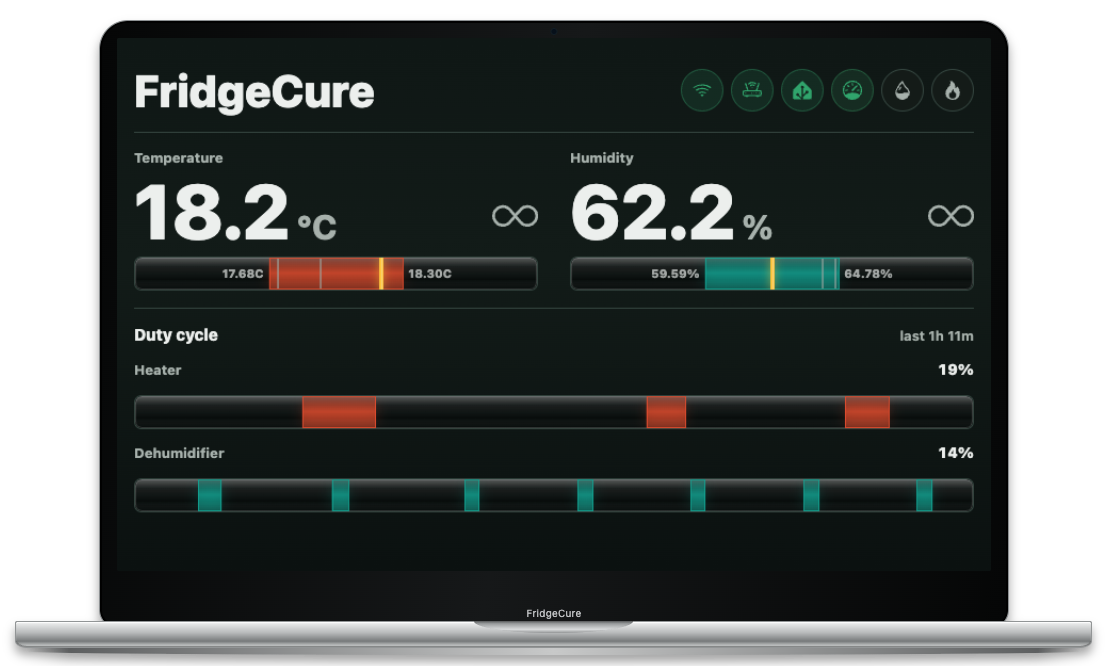
Use the browser dashboard to check current conditions, review recent activity, change settings, and spot sensor or connection problems.
Open the interactive FridgeCure demo to explore the dashboard and settings without a device.
This is an experimental DIY controller, not a certified appliance safety system. You are responsible for electrical safety, food safety, process suitability, and supervision of your equipment.
Because FridgeCure controls humidity by cycling a refrigerator compressor, the required compressor cooldown limits how tightly it can hold the target, allowing humidity to drift while the compressor waits to restart. Commercial curing chambers may provide steadier control through purpose-built systems, including thermoelectric (Peltier) cooling that does not require the same cooldown period. Airflow can also be less even in a converted fridge than in a commercial chamber, although better fan placement and circulation design may improve it.
This project combines mains electricity, moisture, refrigeration, and heat. Test the system while you are present before leaving it unattended.
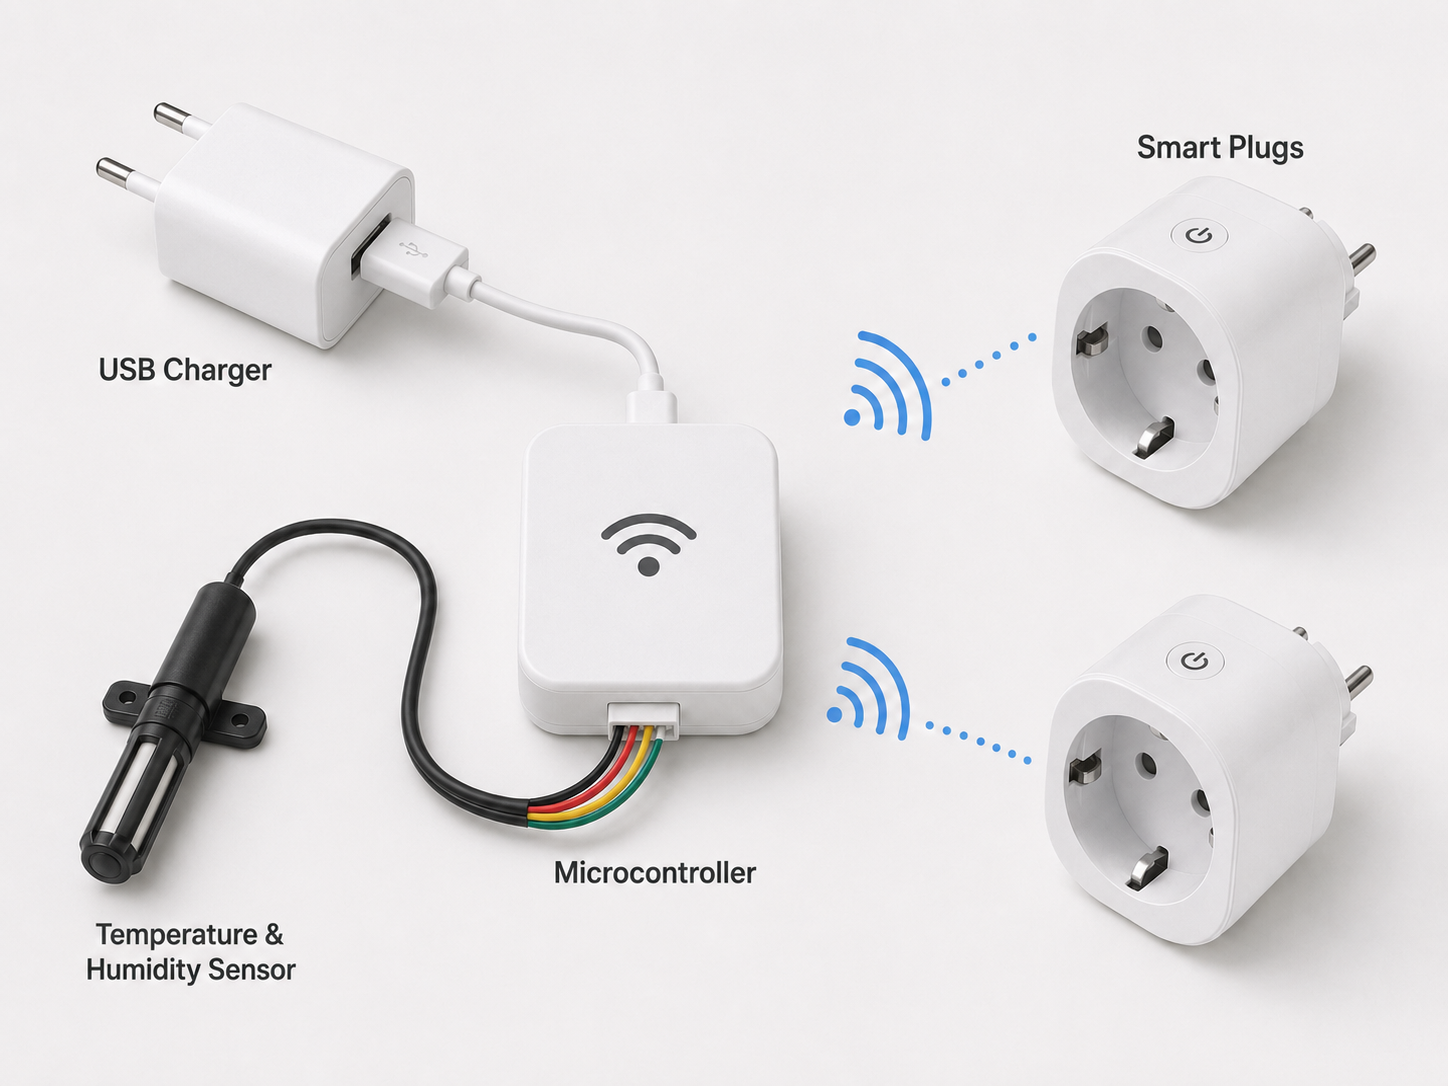
These parts replace the off-the-shelf temperature and humidity controllers used in the video. You’ll still need the fridge, heat mat, fan, and the other chamber hardware listed below.
| Part | Quantity | Approximate price |
|---|---|---|
| Small fridge | 1 | 20–100 EUR |
| ESP32 microcontroller (see supported models below) | 1 | 5–15 EUR |
| SHT41 or SHT31 sensor | 1 | 8–20 EUR |
| Tasmota smart plug | 2 | 15–25 EUR each |
| Seedling heat mat | 1 | 20–50 EUR |
| PC fan | 1 | 5–15 EUR |
Pre-flashed plugs are available from suppliers such as Athom's Tasmota range.
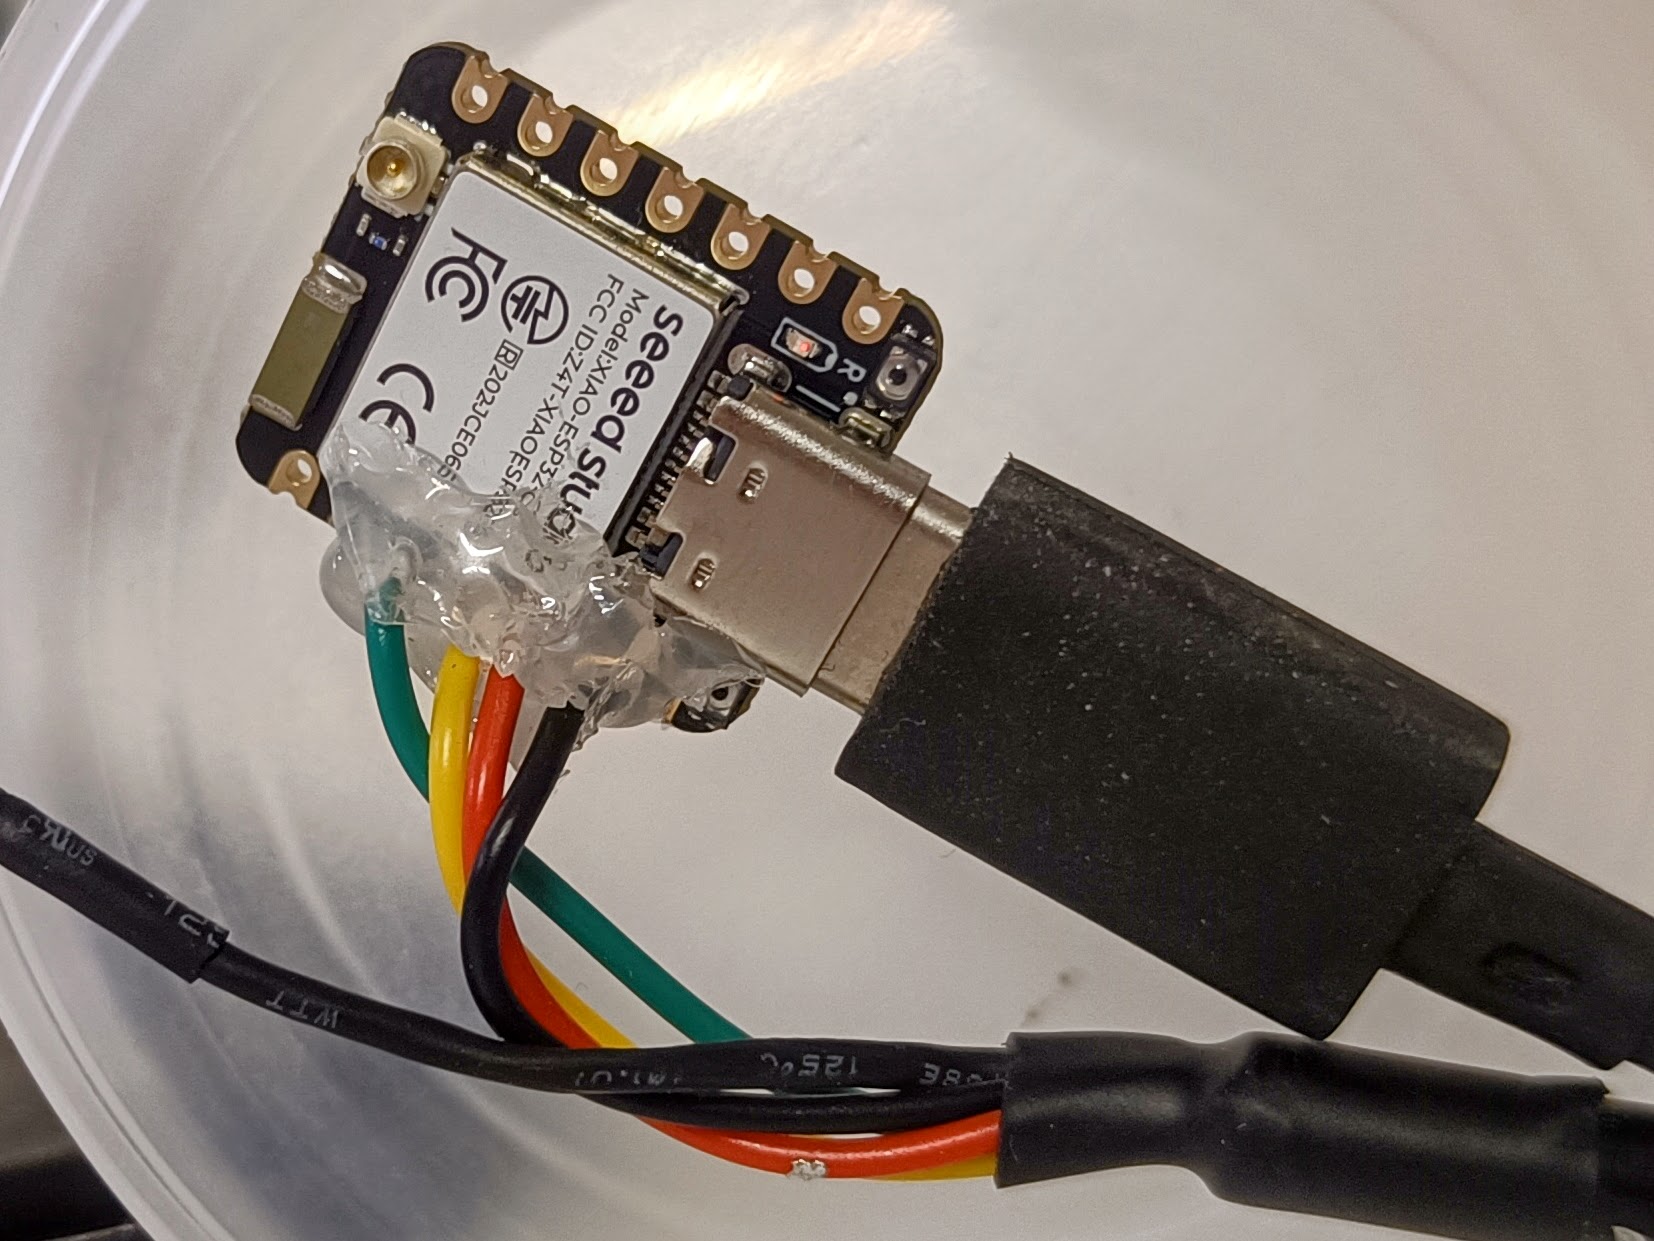
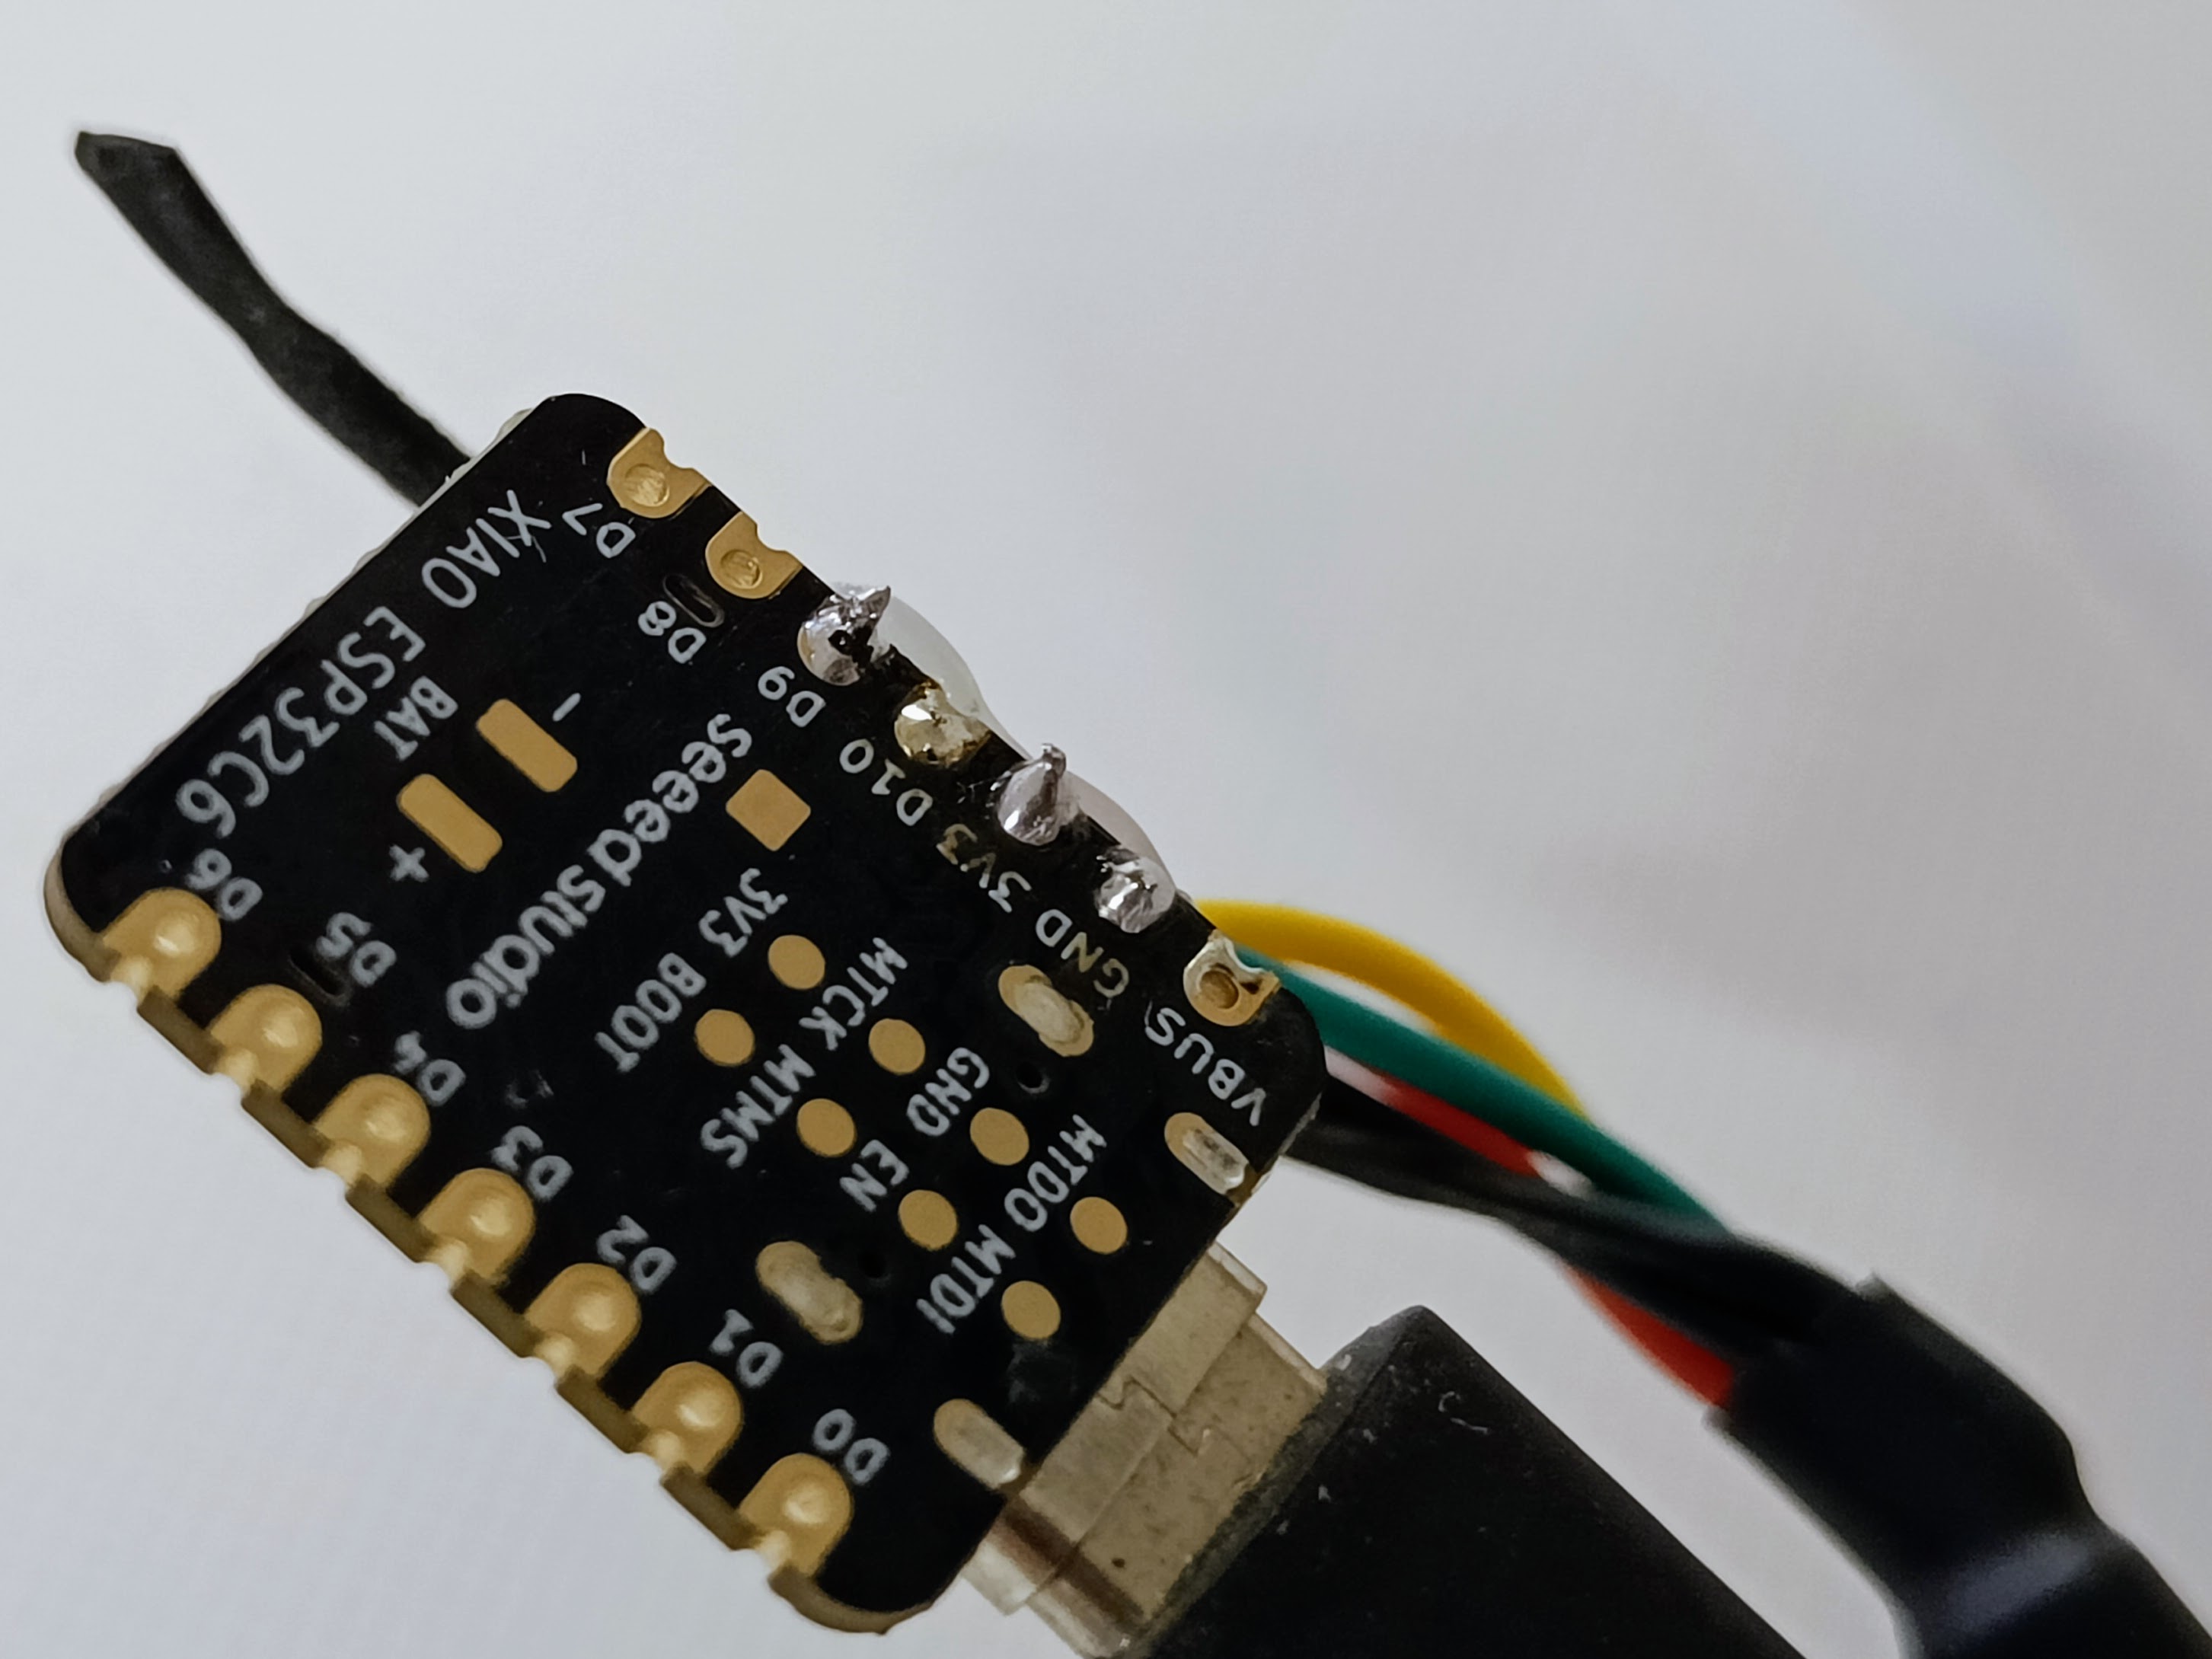
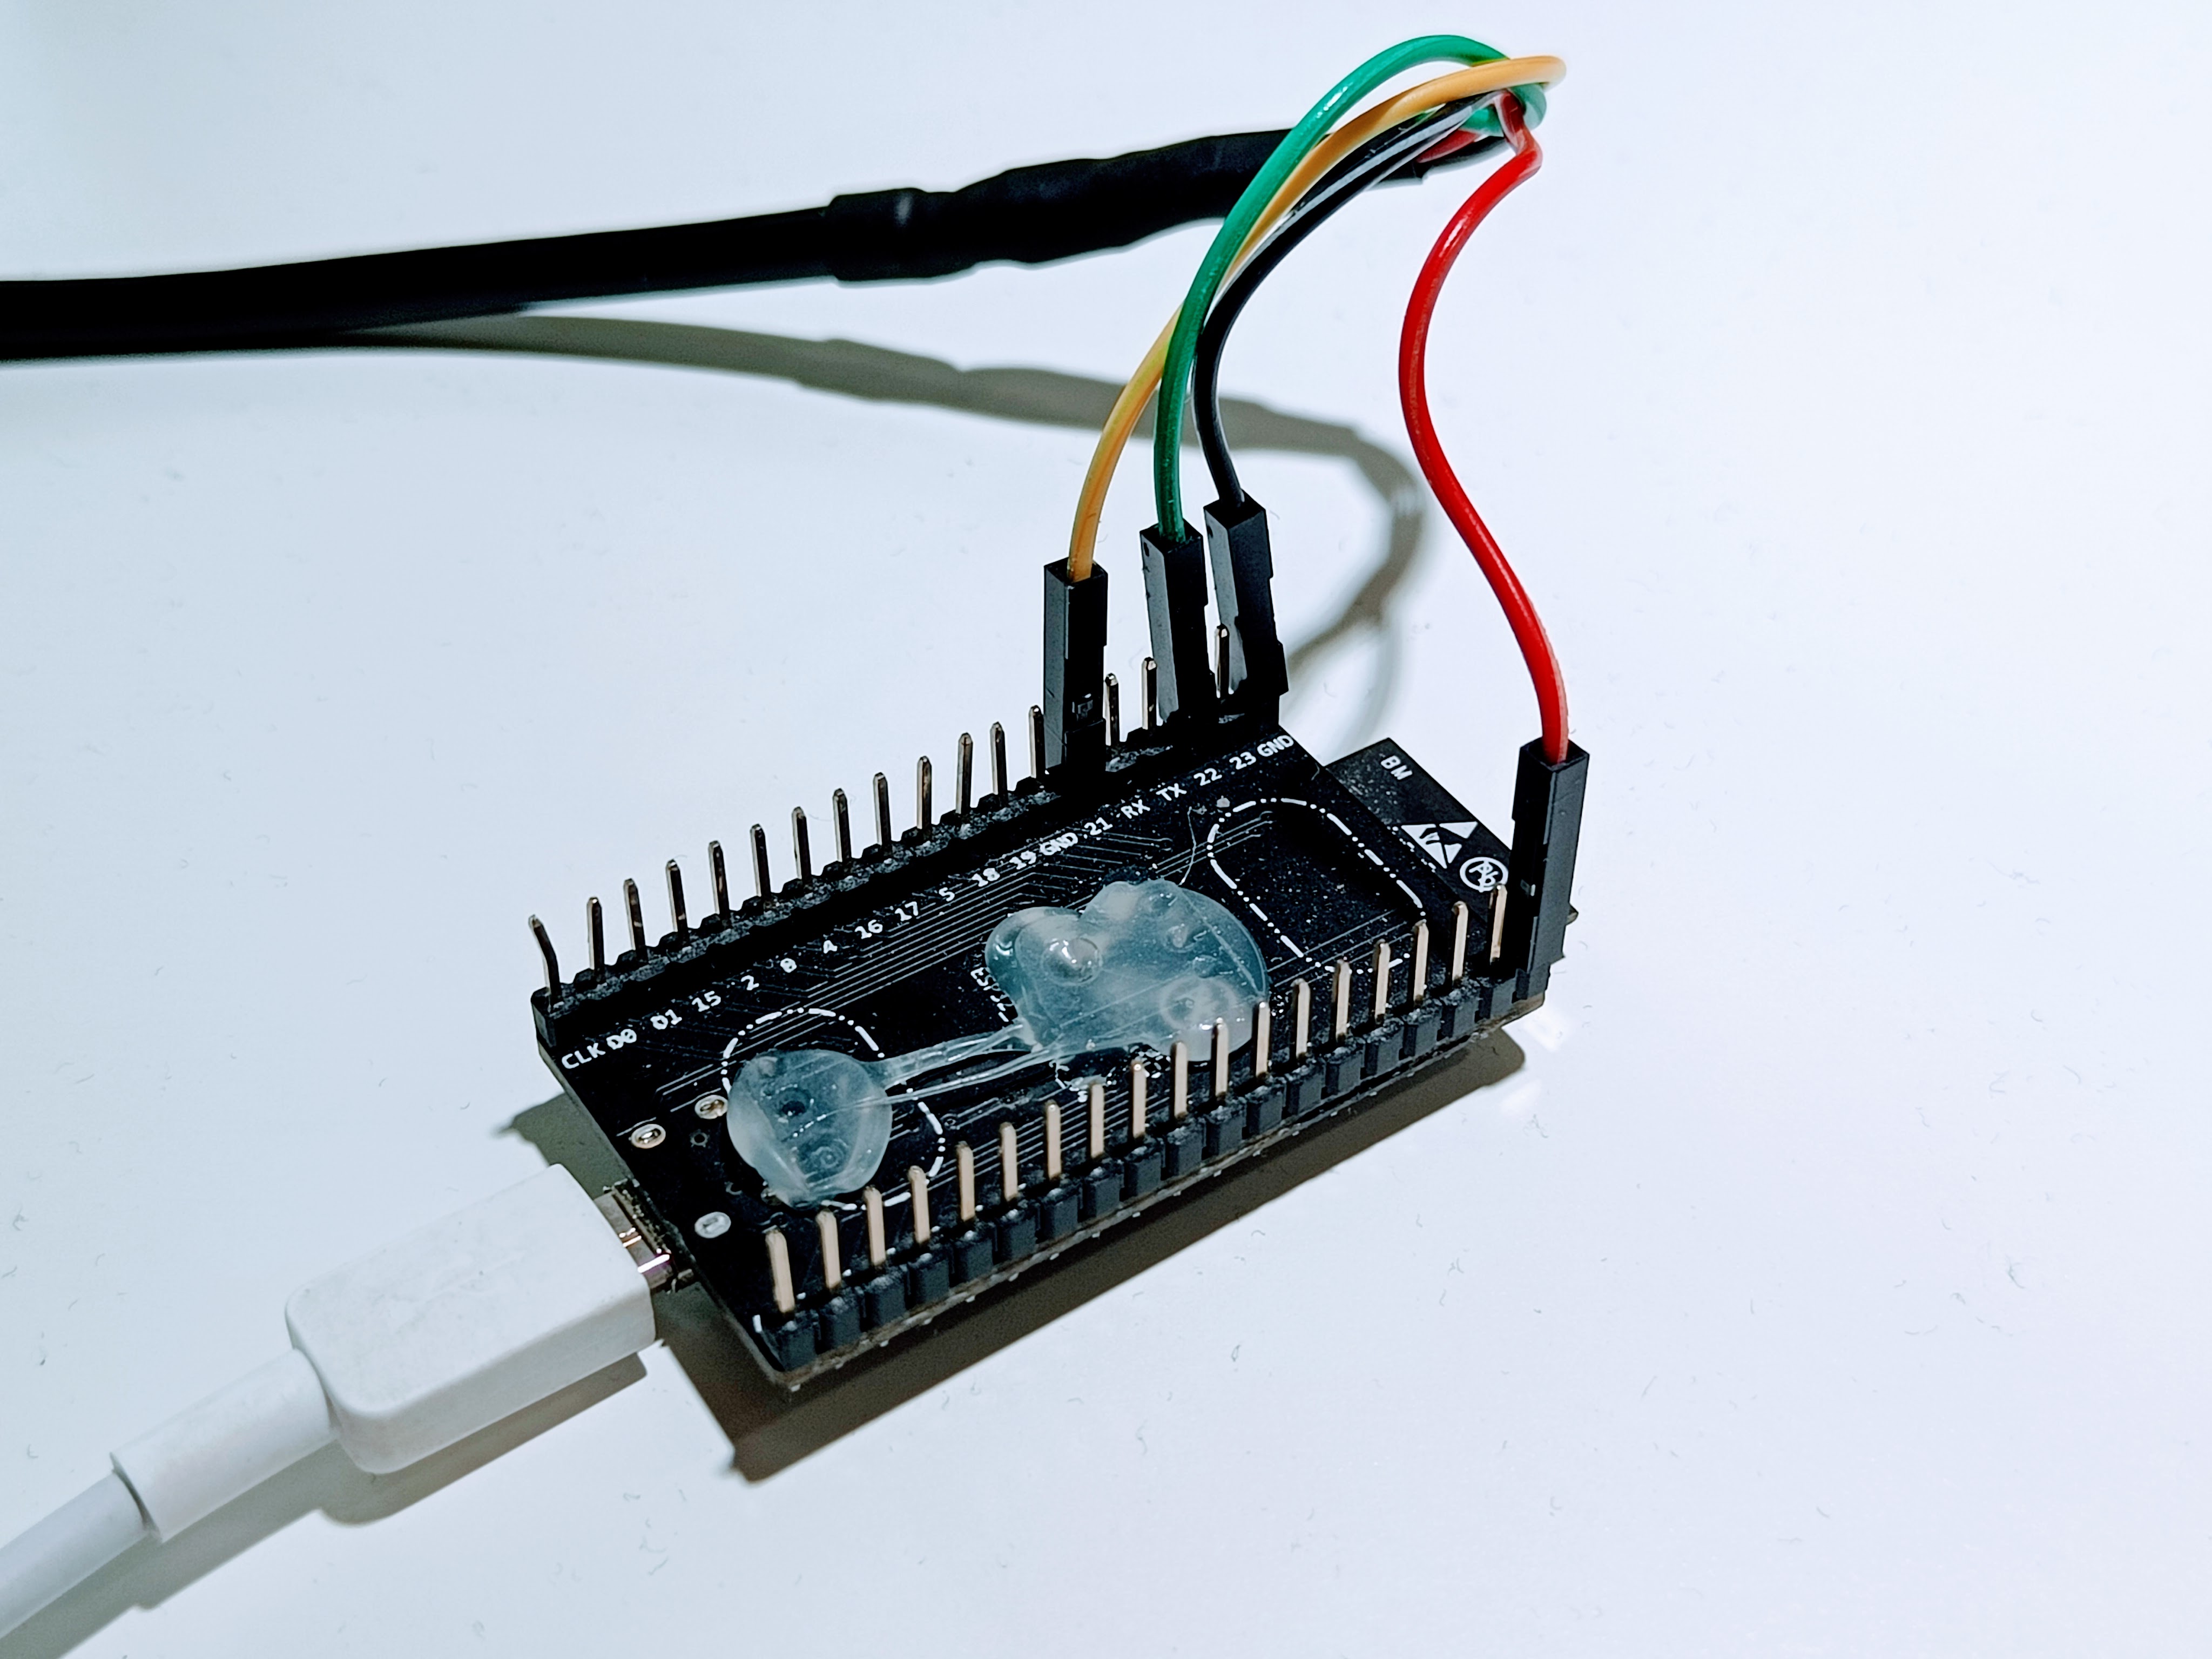
Disconnect power from the control board before wiring the sensor. Connect VCC to 3V3, GND to GND, SDA to the board's SDA pin, and SCL to its SCL pin. The table shows the default pins for each model. You can use other pins and change the SDA and SCL pin assignments later in Settings.
| Board profile | SDA | SCL |
|---|---|---|
| ESP32 Dev Module | GPIO 21 | GPIO 22 |
| M5Stack ATOM Lite (Grove connector) | GPIO 26 | GPIO 32 |
| Seeed Studio XIAO ESP32C6 | GPIO 22 | GPIO 23 |
Hang the sensor in free air near the middle of the chamber. Keep it away from the cold wall, heat mat, direct fan outlet, and condensation.
No installer app required
FridgeCure is installed directly onto a supported control board. Use a desktop version of Chrome or Microsoft Edge and a USB data cable. Safari and Firefox do not support the type of USB connection this installer needs. Before connecting, the installer guides you through choosing a device name, private Wi-Fi password, optional home Wi-Fi credentials, and sensor type.
Loading the FridgeCure installer…
The installer uses the device name to create separate private Wi-Fi, local hostname, Home Assistant display name, and MQTT topic settings. Those settings remain independent after installation. Use Erase everything before installing only for recovery or a deliberate factory reset.
After installation, FridgeCure restarts with a private Wi-Fi network named after the chosen device, together with the selected password and sensor type.
FridgeCure and fridgecure.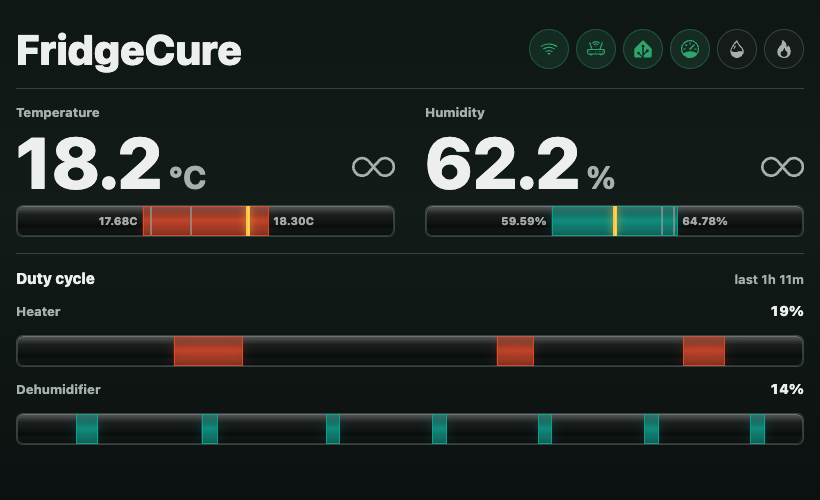
Skip these steps if you supplied home Wi-Fi credentials during browser installation.
You can then use the displayed device IP. If the network supports mDNS, use the local address shown by the installer. For example, a device named Curing Fridge 1 uses http://curing-fridge-1.local.
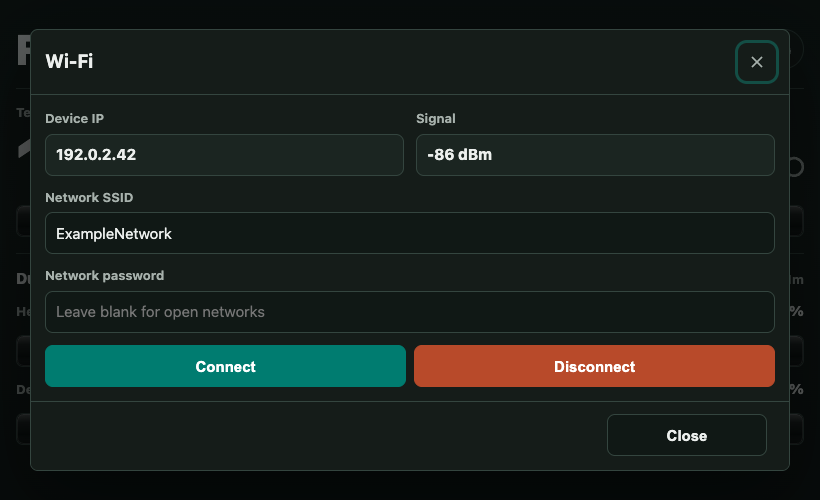
Use one plug for the fridge and one for the heat mat. Both plugs should join the private Wi-Fi network named after your FridgeCure device so control continues without the home network.
http://192.168.4.1.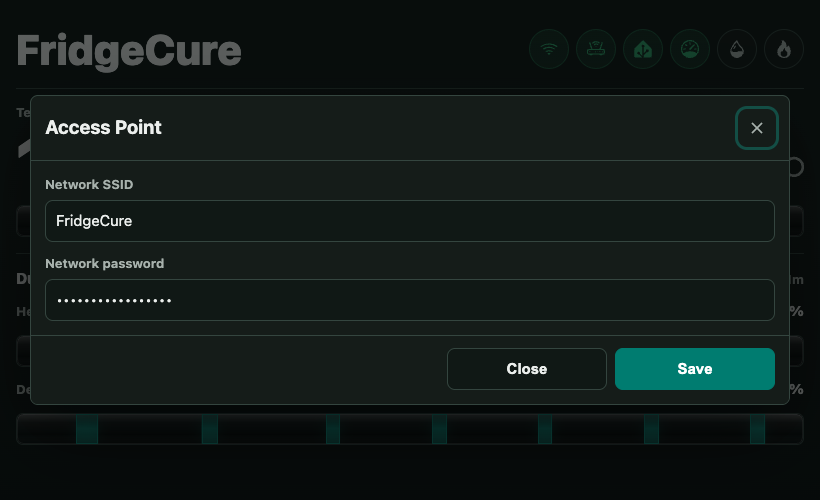
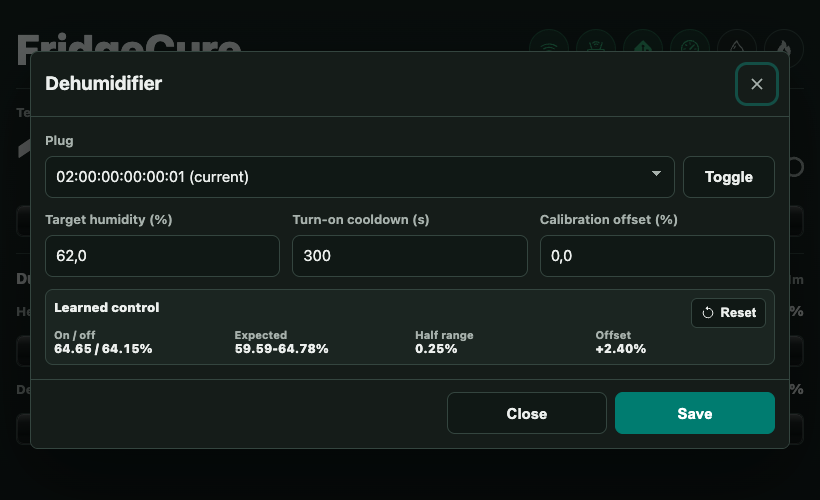
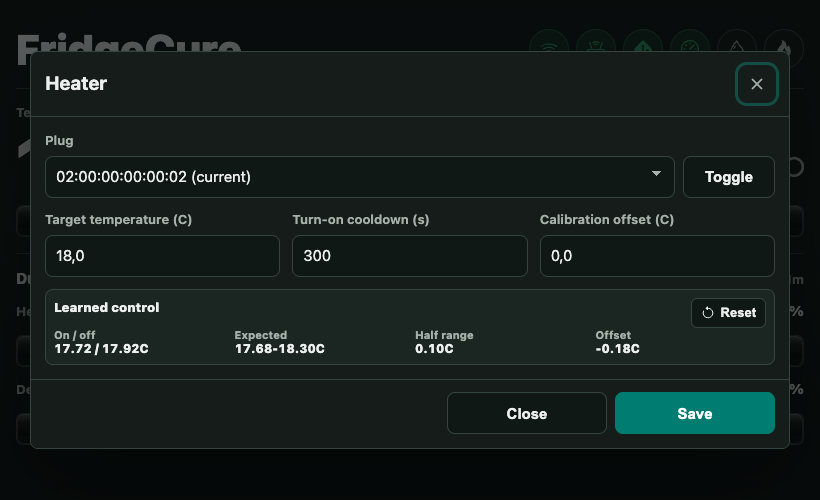
Good targets depend on the material, chamber, and ambient conditions. As an initial supervised test, 58% RH and 20 °C are reasonable example values—not universal curing advice.
The targets are averages rather than fixed switch points. FridgeCure learns a control band around each target and adjusts it after valid operating cycles. Watch the first cycles and confirm that the fridge reduces humidity, the heater raises temperature, the fan stabilizes readings, and the compressor does not short-cycle.
FridgeCure works without Home Assistant. MQTT discovery can add readings, targets, device activity, and sensor health to an existing Home Assistant installation.
homeassistant unless the broker uses another prefix.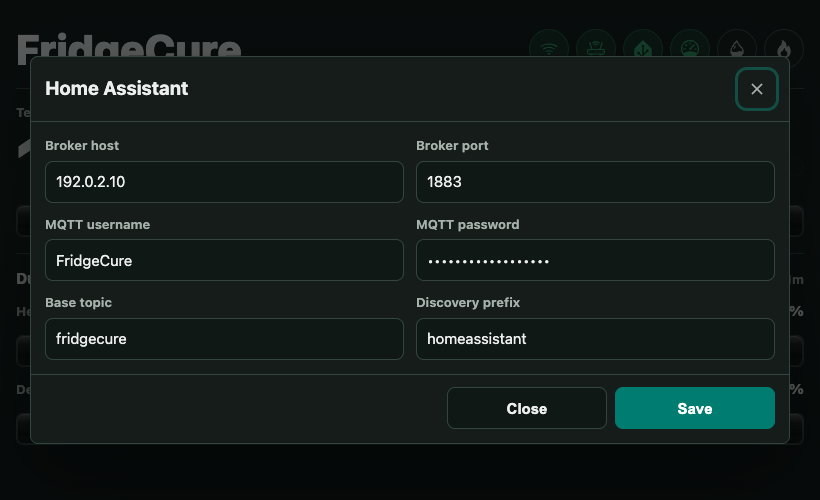
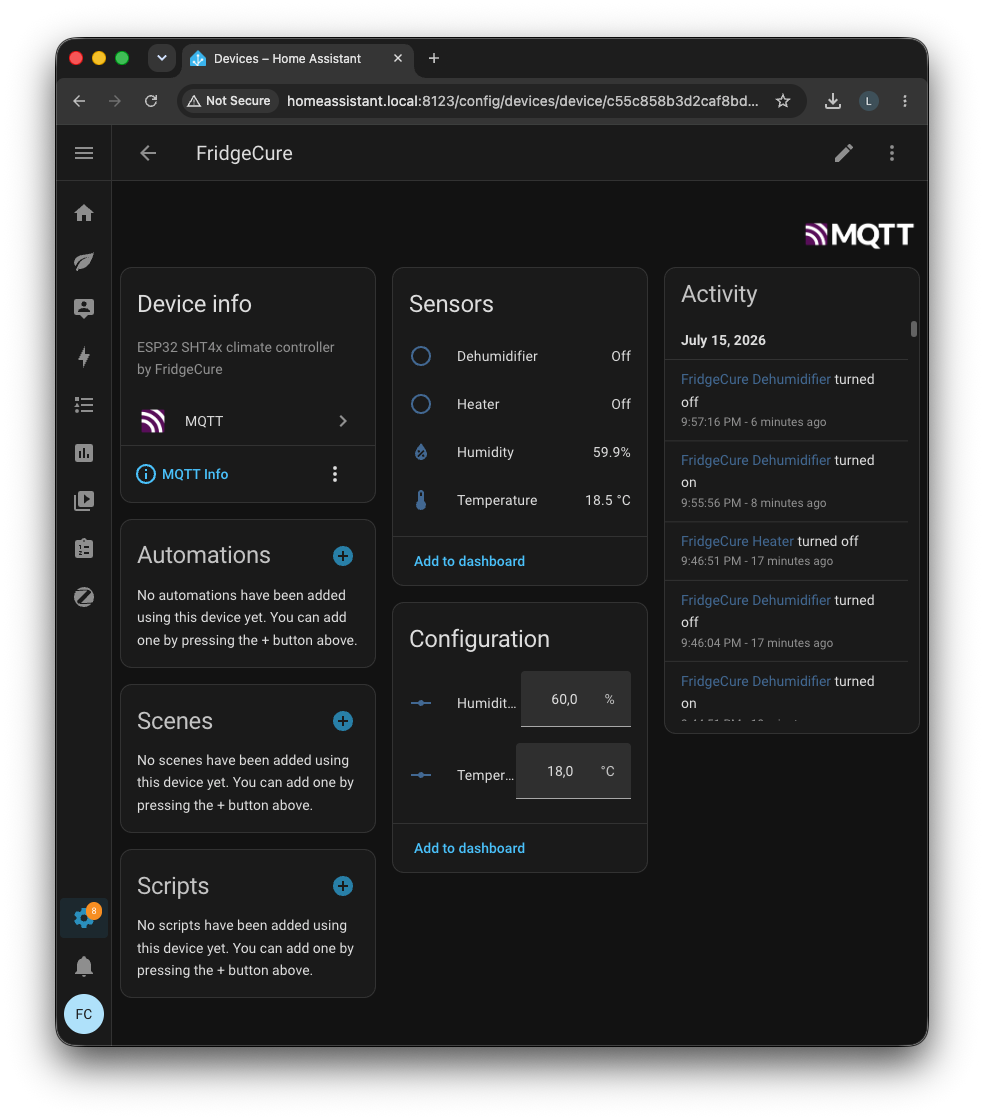
See the Home Assistant MQTT documentation for broker and discovery setup.
The data was recorded from a FridgeCure device in Home Assistant over five hours.
59.93%time-weighted mean
18.09 °Ctime-weighted mean
pp means percentage points; pp² is the corresponding variance unit.
The stepped lines show recorded sensor states, the dashed lines show the time-weighted means, and the shaded bands show the middle 90% of readings (P5–P95).
The humidity chart could not be drawn. The summary statistics remain available above.
The temperature chart could not be drawn. The summary statistics remain available above.